This is featured post 1 title
Replace these every slider sentences with your featured post descriptions.Go to Blogger edit html and find these sentences.Now replace these with your own descriptions.

This is featured post 2 title
Replace these every slider sentences with your featured post descriptions.Go to Blogger edit html and find these sentences.Now replace these with your own descriptions.

This is featured post 3 title
Replace these every slider sentences with your featured post descriptions.Go to Blogger edit html and find these sentences.Now replace these with your own descriptions.

Showing posts with label eyeshadow. Show all posts
Thursday, December 2, 2010
Tutorial :: Using StillGlamorus Smokey Glam Couture Set
So YAY! finally a tutorial.. it may not be the best, but it is one! and i hope by my subbies that watch, i'll get some feedback and see what i can improve etc.. ;) so enjoy!
Products Used:
EYES:
-TFSI
-StillGlamorus.com "Smokey Glam Couture" set (Vintage, Porcelain Doll, Dress Maker)
-StillGlamorus.com eyeshadow in "Single"
-MAC Soft Brown Eyeshadow
-L'Oreal Carbon Black Lineur intense liquid eyeliner
-Covergirl Liquiline eyeliner pencil in Blackfire (waterline/lowerlashline)
-Maybelline the Falsies Mascara
- Rimmel Eyebrow pencil in Dark Brown
FACE:
- MUFE Duo Mat Powder foundation in "203" light beige
- Graftobian Soft Orange HD Creme Corrector
- Graftobian HD foundation palette in "vixen" used as concealer
- MAC Eversun Blush
- MAC Blushbaby Blush
- MAC Emote (to contour)
- MAC By Candlelight MSF (highlight)
LIPS:
- MAC Velvet Teddy Lipstick
- MAC Spice Lipliner
- MAC Boy Bait Cremesheen Glass
it really has been a few months since i last did a video, that i had forgotten parts of my eyes LOL like inner/outter lid haha.. i was at a loss for words.. and then of course i'm not gonna add it, but i totally didn't know i was recording while i was all glamming up my hair AHAHA.. how embarassing.. but i had fun doing this..
Ness from nerdyness.com had inspired me to actually do this tutorial, since i had been wanting to do a video, but wasn't sure what to do :) this one's for you hun!
Here are pictures again of the swatches of the eyeshadows i used from stillglamorus cosmetics. :)
Porcelain Doll - Vintage - Dress Maker
I looove my blogging buds! they are awesome! <3 but anywho, here are pictures of the final look.. totally have no idea what the heck happened to the settings on my camera since it's been ages since i did a video.. but.. please bare with me! hope you enjoyed the video nonetheless!
until the next one! which will actually be really really soon! :)
Sunday, August 1, 2010
My Complete List of MAC Eyeshadows, Pigments & Paintpots/Paints
08/01/10 -This is an updated post on ALL my MAC Eyeshadows, Pigments, Paint pots & Paints
(the pictures below of the actual colors inside the palettes are old) the DVD rack with the palettes is how i have them right now :)
All That Glitters
Amber Lights
Antiqued
Amber Lights
Antiqued
Atlantic Blue
Aquavert
Bang on Blue
Beauty Marked
Birds & Berries
Blackberry
Blanc Type
Black Tied
Black Tulip
Beautiful Iris
Bold & Brazen
Bough Grey
Aquavert
Bang on Blue
Beauty Marked
Birds & Berries
Blackberry
Blanc Type
Black Tied
Black Tulip
Beautiful Iris
Bold & Brazen
Bough Grey
Brash
Bravado
Bravado
Bright Future
Bronze
Brown Down
Bronze
Brown Down
Bruised Plum
Carbon
Chrome Yellow
Cinders
Circa Plum (Pressed Pigment)
Clarity
Carbon
Chrome Yellow
Cinders
Circa Plum (Pressed Pigment)
Clarity
Climate Blue
Club
Contrast
Cool Heat
Coppering
Club
Contrast
Cool Heat
Coppering
Coral
Cork
Courage
Cranberry
Creme De Violet
Da Bling
Daisychain
Dame's Desire
Dark Edge
Dear Cupcake
Deep Truth
Electra
Electric sky
Cork
Courage
Cranberry
Creme De Violet
Da Bling
Daisychain
Dame's Desire
Dark Edge
Dear Cupcake
Deep Truth
Electra
Electric sky
Embark
Endless Love
Espresso
Expensive Pink
Endless Love
Espresso
Expensive Pink
Eye Popping
Femme Noir
Fab & Flashy
Femme Noir
Fab & Flashy
Fig 1
Firecracker
Firespot
Flip
Flourishing
Folie
Fresh Approach
Freshwater
Firespot
Flip
Flourishing
Folie
Fresh Approach
Freshwater
Gentle Fume
Gentle Heat
Glamour check!
Gingersoft
Girlie
Girl Meets Boy
Goldmine
Glamour check!
Gingersoft
Girlie
Girl Meets Boy
Goldmine
Going Bananas
Gorgeous Gold
Gorgeous Gold
Grand Entrance
Greensmoke
Grey Range
Handwritten
Hard to Please
Haux
Hepcat
Honest + Tan Pigment (Pressed)
Honey Lust
Hot Hot Hot
Humid
Image Maker
Jest
Greensmoke
Grey Range
Handwritten
Hard to Please
Haux
Hepcat
Honest + Tan Pigment (Pressed)
Honey Lust
Hot Hot Hot
Humid
Image Maker
Jest
Juiced
Jungle Moon
Juxt
Knight Divine
Lavender Sky
Lotusland
Memorabilia
Mink Pink
Modelette
Mulch
Mythology
Naked Lunch
Jungle Moon
Juxt
Knight Divine
Lavender Sky
Lotusland
Memorabilia
Mink Pink
Modelette
Mulch
Mythology
Naked Lunch
Nanogold
Next to Nothing
Next to Nothing
Nile
Nocturnelle
Nylon
Nocturnelle
Nylon
Off the Page
One-Off
Orb
Orb
Paradisco
Parfait Amour
Parfait Amour
Parrot
Passionate
Passionate
Patina
Pearl of the earth
Photo Realism
Pleasurepurr
Plum
Plumage
Plum dressing
Post Haste
Print
Pearl of the earth
Photo Realism
Pleasurepurr
Plum
Plumage
Plum dressing
Post Haste
Real Drama
Restless
Retrospeck
Romp
Romping
Rondelle
Restless
Retrospeck
Romp
Romping
Rondelle
Rose
Sable
Sable
Sassy Grass
Satellite Dreams
Satin Taupe
Shale
Sharp
Satellite Dreams
Satin Taupe
Shale
Sharp
Shock-a-Holic
Shroom
Signed, Sealed
Silver Ring
Sketch
Smoke & Diamonds
Soft brown
Soulsong
Shroom
Signed, Sealed
Silver Ring
Sketch
Smoke & Diamonds
Soft brown
Soulsong
Spiced Chocolate
Springtime Skipper
Star Violet
Stars N Rockets
Steamy
Star Violet
Stars N Rockets
Steamy
Style Influencer MES
Sumptuous Olive
Sushi Flower
Sushi Flower
Sweet Joy
Sweet & Punchy
Sweet Chestnut
Swimming
Swiss Chocolate
Take Wing
Swimming
Swiss Chocolate
Take Wing
Talent Pool
Tease N Teal
Tempting
Tickles
Tilt
Tease N Teal
Tempting
Tickles
Tilt
Togetherness MES
Top Hat
Trax
Twinks
Trax
Twinks
Unreally Blue
Up-Do
Vanilla
Vellum
Velvet moss
Vex
Vibrant Grape
Waft
Up-Do
Vanilla
Vellum
Velvet moss
Vex
Vibrant Grape
Waft
Warm Chill
Warm Suede
Well-Plumed
Well-Plumed
Well Spiced
Wondergrass
Woodwinked
Young Punk MES
Woodwinked
Young Punk MES
Some of the eyeshadows above, used to be in pre-made MAC Quads/palettes etc - here are where they are from:
MAC Delights: 6 Eye/Trend (have not depotted yet)
Gingersoft
Pearl of the Earth
Satin Taupe
Gorgeous Gold
Tease 'N Teal
MAC Suedette: 6 Intense Eyes (have not depotted yet)
Phloof!
With a Twist
Till Daybreak
Nightbird
Smut
Gallant
MAC Intriguing Scarlet : 6 Warm Eyes (have not depooted yet)
SweetJoy
Warm Suede
Well Spiced
Gentle Heat
Real Drama
Grand Entrance
MAC Quads: (these are all depotted)
MAC Spring Colour 3 Forecaste : Colour 3 Eyeshadow Quad
Mink Pink
Bruised Plum
Black Tulip
Jungle Moon
Take Wing Eyes:
Restless
Take Wing
Tickles
Bravada
Photo Realism:
Photo Realism
Fresh Approach
Image Maker
Grey Range
Tempt Me:
Girl Meets Boy
Hard to Please
Modelette
Pleasurepurr
Gentle Fume eyes:
Rondelle
Waft
Gentle Fume
Carbon
Tempting:
Next to Nothing
Tempting
Sharp
Dark Edge
Diana Eyes: 1:
Vex
Up-Do
Endless Love
Soulsong
Well-Plumed Eyes:
Well-Plumed
Shroom
Espresso
Courage
Spiced Chocolate:
Nanogold
Brash
Spiced Chocolate
Sweet Chestnut
Paint Pots:
Artifact
Constructivist
Delft
Fresco Rose
Greenstroke
Indianwood (sample)
Painterly
Rubenesque
Soft Ochre
Paints:
Bare Canvas
Chartru
Pigments:
Blonde's Gold (sample)
Chocolate Brown (sample)
Gold Mode (sample)
Golden Lemon (sample)
Heritage Rouge (sample)
Jardin Aires (sample)
Later (new style jar)
Partylicious (new style jar)
Sweet Sienna (old style jar full & sample)
Vanilla (sample)
My pre-made LE MAC palettes
My MAC Palettes ALL filled finally!
Bronze/Brown Palette
Highlight/Neutral Palette
Pinks & Browns lol (need to organize)
Greens (Had too many browns lol)
Greys/Silvers/Blacks (supposed to be my Smokey Palette)
Yellows/Golds (the others just didn't have anywhere to put)
Dark Purples
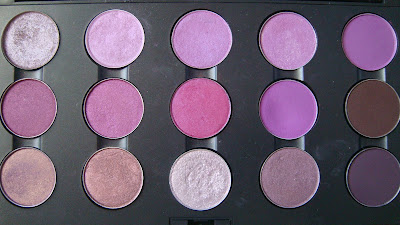
Lighter/Brighter Purples (the brown i had no where else to put lol)
Teal/Aquas/Blues (didnt have room for the other two)
I will update the pictures of my palettes as the pictures above are not updated and since then i have been able to reorganize and all my shadows are in palettes ('cept some pots)
Thursday, July 29, 2010
Tutorial :: Quick & Easy Blue Smokey Eye with Wet 'N' Wild Color Icon Palette in Pride
So this was really spontaneous (The quality isn't that great because I decided to film on my laptop instead).. but I wanted to quickly do a tutorial using the Wet N Wild Color Icon Palette in Pride. When I was recording I originally recorded everything from putting on my foundation, then the eyes, then the eyeliner, curling my eyelashes, mascara, the blush etc etc! lol.. but then realized it'd be not so quick anymore LoL! so i'll actually save that for another day.
Yes i'm aware it's not perfect! (well obviously cause i was in a hurry and was real pressed with time).. but it's decent and it works (for me at least lol).. so yea! if you want to watch the video, please do!
The video is longer than i expected because i was doing both eyes (instead of just doing one on the video)
So hope you like the video - i know i'm such a dork haha! anywho, here are the products that I used in the look:
FACE:
Stila One Step Foundation in 'Tone'
MAC Well Dressed for Blush
EYES:
NARS Smudgeproof Primer
Wet N Wild Palette in "Pride"
Covergirl Liquiline eyeliner in "Blackfire"
Maybelline The Falsies Mascara
LIPS:
MAC Easy Lounger Lipglass
FACE:
Stila One Step Foundation in 'Tone'
MAC Well Dressed for Blush
EYES:
NARS Smudgeproof Primer
Wet N Wild Palette in "Pride"
Covergirl Liquiline eyeliner in "Blackfire"
Maybelline The Falsies Mascara
LIPS:
MAC Easy Lounger Lipglass
**FYI** My old youtube channel (youtube.com/randomnesswithkhris), will now be moving all my videos etc to my new channel to match my new blog etc (youtube.com/MyFitBeauty) so please, please, subscribe to my new channel!
And now on to the Tutorial:
And the final Product ;)
Let me know what ya think! And if you haven't yet - please subscribe to my channel! it's FREE!
Tuesday, July 27, 2010
FOTD :: Coral Delight
Sorry for the cheesy title LoL! but today was just that, mainly coral colors.. thought i'd add the lovely pop of color on the waterline for some fun! I'm not used to, not wearing black eyeliner all around.. but thought it was a great change! Let me know what you think!
FACE:
Korres Face Primer
Stila One Step Foundation in Tone
MAC MSFN in Medium
CHEEKS:
MAC Light Over Dark Mineralized Duo Blush
MAC By Candlelight to highlight only
EYES:
MAC Blanc Type eyeshadow to highlight
MAC Coral Eyeshadow all over lid
MAC Handwritten on outer corner/crease area (very, very lightly)
Flirt! Lash-a-delic Mascara in Black
FLirt! Look of love eye pencil in Bluephoria (on lowerlashline/waterline area)
LIPS:
Maybelline color sensational "The Pearls" collection lipstick in Coral Gleam
Application Steps:
Eyes:
(Totally forgot to wear any primer/base - as i originally thought i was not going to wear eyeshadow today)
I Took a regular fluffy eyeshadow brush, picked up some Coral e/s and placed it all over the lid just a little bit above the crease. I then took a blending brush and applied very lightly handwritten e/s on the crease and outer corner and blended it out very well.
I then took a Fluffy brush and applied MAC Blanc Type e/s to my highlight/browbone area and blended any harsh edges.
I then applied my eyeliner only to the lower lashline. II then Curled my eyelashes and applied the mascara.
FACE:
I used a MAC 109 Brush to pick up some Stila One Step Foundation and buffed it into the skin (a little goes a long way). I then Applied MAC MSFN with a MAC 134 brush.
CHEEKS:
For Blush I used the ELF Studio Blush brush and applied MAC Light Over Dark on the apples of my cheeks and then just continued from the cheeks upwards to the temples. I then applied with that same brush (on the other side) MAC By Candlelight MSF just to the cheekbones
LIPS:
Just applied Maybelline Colorsensational lipstick in Coral Gleam
Hope you all liked it!
Monday, July 19, 2010
FOTD : Love my Purples
So by now, you all probably know i tend to favor wearing purple! :) today monday, i decided to wear my Hello Kitty Scrub top and black dickies pants.. :) so comfy! because I know today is going to be a rough day (monday's usually are)..
so this is the quick look i did for today & products used:
FACE:
MAC Studio Finish Concealer NW25 (under eyes)
MAC Select Cover-Up Concealer in NC20 (redness around nose/ red spots)
MAC Mineralize Skin Finish Natural in Medium
Cheeks:
MAC Goddess Blush on apples of cheeks
MAC Stereo Rose MSF on cheeks
MAC Emote (contour)
Lips:
MAC Easy Lounger Lipglass
Eyes:
MAC Fresco Rose Paint Pot (as a base)
MAC Dame's Desire e/s on lid
MAC Hepcat e/s on crease
MAC Nocturnelle e/s outter corner/slightly on crease
MAC Beauty Marked e/s Outter corner
MAC Next to nothing e/s for highlight
Bobbi Brown Ink Gel eyeliner in black
EYES:
First I started off with MAC Fresco Rose Paint pot and applied that all over the lid with my ring finger. and just a teeny tiny bit above the crease. I then took a Studio Tools Medium eyeshadow brush and put on MAC Dame's Desire on top of Fresco Rose. I then took a MAC 226 Brush and applied MAC Hepcat e/s all over the crease and blended with windshield wiper motions and also upwards to blend any harsh edges. I then took that same MAC 226 brush and took MAC Nocturnelle e/s and applied it to the outter corner and bringing/sweeping it lightly towards the crease blending it. I then took MAC Beauty Marked (with same brush) and put it only on the outter corners.. (to make a "V" shape).. then i took a fluffy eyeshadow brush and took MAC Next to nothing e/s and applied as my highlight on the brow bone and also blended out any harsh edges.
FACE:
So I used MAC Studio Finish concealer in NW 25 and applied it to my dark circles (using my ring finger). I then took MAC Select Cover up in NC20 with a MAC 130 brush and applied/blended on the corners of my nose and redness on my cheek (acne). I then Applied MAC MSFN with a MAC 134 brush.
CHEEKS:
For Blush I used the ELF Studio Blush brush and applied MAC Goddess Blush on the apples of my cheeks. I then took MAC Stereo Rose MSF and lightly went over MAC Goddess Blush. I then contoured with a MAC 109 brush and used MAC Emote to contour.
LIPS:
Just applied MAC Easy Lounger to the lips.
Friday, July 16, 2010
Review :: Glam'Eyes Single Eyeshadows By Rimmel
So I was browsing the aisle of Target the other day, and Saw these eyeshadows in the Rimmel section. The colors were quite appealing and i didn't really having anything quite like it, and for the price $2.99, I couldn't pass it up!
I only got two colors: Posh Peacock, Spicy Bronze
It has really cute font on it's packaging (i'm a sucker for cutesie font) and the colors itself are really gorgeous!
Here are some swatches:
they had some other colors, and for $2.99, i think i'd get them all. only because for days I do not want to use my MAC/high end shadows.. i think this is perfect.. especially how they are singles, and you can bring them with you for touch ups if you wanted to. Plus it's only $2.99 - so what do you have to lose? the colors are rather gorgeous and there is no fall-out! (for me at least - on these two shadows in particular) they have a sort of velvety/satin feel when applied to the skin (when i had swatched them on my arm)..
I cannot wait to actually use them for a fotd/look etc.. :) but so far - so good! I think if you're on a budget and don't have a lot to spend and want to have some colors, these eyeshadow singles are perfect!
Packaging: 3/5
Product: 4/5
Value: 5/5 ($2.99 at my local Target)
Ease of Use: 5/5
Overall: 4/5
Recommend?: Absolutely! like I mentioned - it's great if your starting out with make-up/eyeshadows, are on a budget, or just want some eyeshadows to play around with.. these are perfect for the price!
I only got two colors: Posh Peacock, Spicy Bronze
It has really cute font on it's packaging (i'm a sucker for cutesie font) and the colors itself are really gorgeous!
Here are some swatches:
Posh Peacock
Spicy Bronze
they had some other colors, and for $2.99, i think i'd get them all. only because for days I do not want to use my MAC/high end shadows.. i think this is perfect.. especially how they are singles, and you can bring them with you for touch ups if you wanted to. Plus it's only $2.99 - so what do you have to lose? the colors are rather gorgeous and there is no fall-out! (for me at least - on these two shadows in particular) they have a sort of velvety/satin feel when applied to the skin (when i had swatched them on my arm)..
I cannot wait to actually use them for a fotd/look etc.. :) but so far - so good! I think if you're on a budget and don't have a lot to spend and want to have some colors, these eyeshadow singles are perfect!
Packaging: 3/5
Product: 4/5
Value: 5/5 ($2.99 at my local Target)
Ease of Use: 5/5
Overall: 4/5
Recommend?: Absolutely! like I mentioned - it's great if your starting out with make-up/eyeshadows, are on a budget, or just want some eyeshadows to play around with.. these are perfect for the price!
**Disclaimer: this product was purchased by me, I was NOT paid to review this product. this was all on my own behalf**